

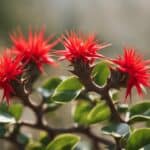

Anthurium Andraeanum, commonly known as the flamingo flower, is a popular houseplant that is prized for its striking, colorful blooms.
It is native to Central and South America and is known for its bright red, pink, or white flowers and glossy, heart-shaped leaves.
Anthurium Andraeanum is relatively easy to care for and can be propagated from simple cuttings, making it an ideal plant for beginners and experienced gardeners alike.

Propagation is the process of creating new plants from existing ones, and it is an important part of gardening.
Propagation allows gardeners to create new plants that are genetically identical to the parent plant, which ensures that the new plants will have the same desirable traits as the parent plant.
Propagation can be done in a variety of ways, including by cuttings, seeds, or division.
In the case of Anthurium Andraeanum, propagation by cuttings is the most common and easiest method.
Understanding Anthurium Andraeanum
Species Overview
Anthurium Andraeanum, also known as the flamingo flower, is a tropical plant native to Colombia and Ecuador.
It is a popular houseplant due to its vibrant colored flowers and glossy green leaves.
The plant belongs to the Araceae family and is one of the most common species of Anthurium.
The flamingo flower is an evergreen perennial that can grow up to 2 feet tall. Its leaves are heart-shaped and can reach up to 6 inches in length.
The flowers are typically red, pink, or white, and have a distinctive spadix, which is a spike-like structure that contains the plant’s reproductive organs.
Ideal Growing Conditions
To ensure the health and growth of Anthurium Andraeanum, it is important to provide the ideal growing conditions.
The plant thrives in warm and humid environments, with temperatures ranging from 60 to 85 degrees Fahrenheit.
It requires bright, indirect light and should be kept away from direct sunlight, which can damage the leaves.
The plant prefers well-draining soil that is rich in organic matter.
It should be watered regularly, but care should be taken not to overwater, as this can lead to root rot.
Fertilizer can be applied every two weeks during the growing season to promote healthy growth and flowering.
Overall, Anthurium Andraeanum is a beautiful and easy-to-care-for plant that can add a touch of tropical elegance to any indoor space.
By providing the ideal growing conditions, it can thrive and produce stunning blooms year-round.
Propagation Basics

Types of Cuttings
Anthurium Andraeanum can be propagated through stem cuttings or division of the plant.
Stem cuttings are the most common method of propagation and are relatively easy to do.
The best time to take cuttings is during the spring or summer when the plant is actively growing.
There are two types of stem cuttings: leaf-bud cuttings and stem-tip cuttings.
Leaf-bud cuttings involve cutting a leaf with a small piece of stem attached and a dormant bud.
Stem-tip cuttings involve taking a cutting from the tip of the stem with a few leaves attached.
Both types of cuttings can be successful, but stem-tip cuttings tend to root more quickly.
Tools and Materials Needed
To successfully propagate Anthurium Andraeanum, you will need a few basic tools and materials. These include:
- Pruning shears or a sharp knife
- Rooting hormone
- Potting soil
- Small pots or containers
- Clear plastic bags or plastic wrap
Before taking cuttings, make sure your tools are clean and sharp to prevent damage to the plant.
Rooting hormone can be purchased at most garden centers and can help encourage root growth in the new cuttings.
Potting soil should be well-draining and free of pests and diseases. Small pots or containers should be clean and have drainage holes.
Clear plastic bags or plastic wrap can be used to create a mini greenhouse to help retain moisture around the cuttings.
By following these basic steps, you can successfully propagate Anthurium Andraeanum and enjoy a flourishing plant in no time.
Step-by-Step Propagation Guide

Preparing the Cuttings
To propagate Anthurium Andraeanum, one must first prepare the cuttings.
The best time to take cuttings is during the spring or summer months when the plant is actively growing.
Choose a healthy parent plant and select a stem that has at least two nodes.
Using a sharp, sterilized knife, cut the stem at a 45-degree angle just below the second node.
Remove any leaves or flowers from the stem, leaving only two or three leaves at the top.
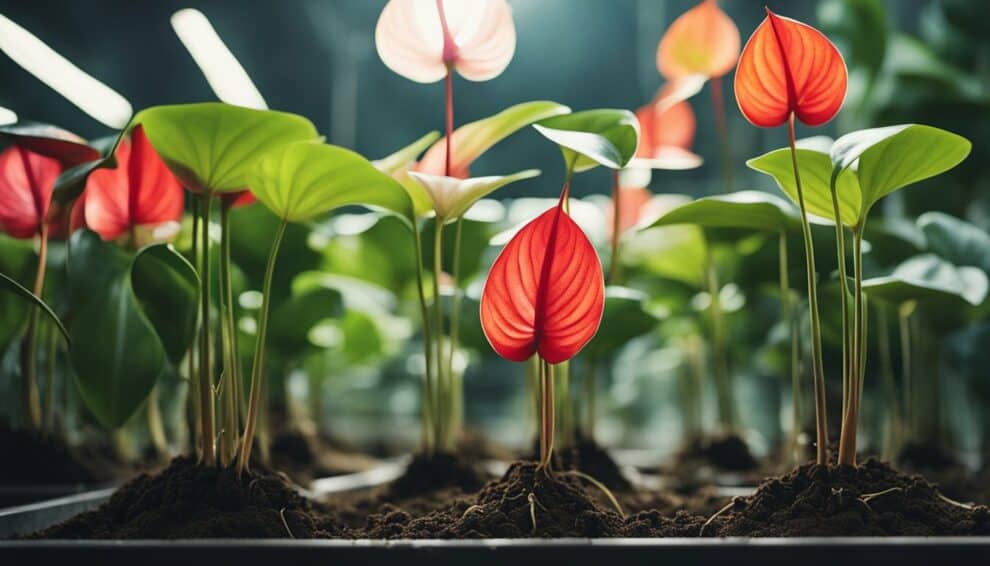
Rooting Process
After preparing the cuttings, the next step is to root them. Fill a small pot with a well-draining potting mix and make a hole in the center.
Dip the cut end of the stem in rooting hormone powder and insert it into the hole. Gently press the soil around the stem to secure it in place.
Water the soil thoroughly and cover the pot with a clear plastic bag to create a humid environment.
Place the pot in a bright, warm location, but out of direct sunlight.
Check the soil moisture regularly and water as needed to keep it moist but not waterlogged.
After a few weeks, new growth should appear, indicating that the cutting has rooted.
Transplanting
Once the cutting has rooted, it’s time to transplant it into a larger pot.
Choose a pot that is one size larger than the current one and fill it with a well-draining potting mix.
Carefully remove the rooted cutting from the small pot and gently loosen the soil around the roots.
Place the cutting in the new pot and fill in with potting mix. Water the soil thoroughly and place the pot in a bright location with indirect sunlight.
In conclusion, propagating Anthurium Andraeanum is a simple process that can be done with just a few cuttings.
By following these step-by-step instructions, anyone can enjoy a flourishing Anthurium Andraeanum plant in their home.
Aftercare and Troubleshooting

Optimal Aftercare Tips
Once the Anthurium Andraeanum cuttings have rooted and are growing, proper aftercare is essential to ensure their continued health and growth.
Here are some tips to keep in mind:
-
Watering: Anthuriums prefer consistently moist soil, but overwatering can lead to root rot.
Water the plant when the top inch of soil feels dry to the touch, and make sure the pot has drainage holes to prevent water from pooling in the bottom.
-
Light: Anthuriums thrive in bright, indirect light. Avoid placing them in direct sunlight, which can scorch the leaves.
-
Temperature: These plants prefer temperatures between 60-80°F (15-27°C). Avoid exposing them to cold drafts or extreme heat.
-
Fertilizer: Feed your Anthurium Andraeanum with a balanced, water-soluble fertilizer every 4-6 weeks during the growing season (spring and summer).
Common Issues and Solutions
Even with proper care, Anthurium Andraeanum can sometimes encounter issues. Here are some common problems and their solutions:
-
Yellowing leaves: This can be a sign of overwatering, underwatering, or too much direct sunlight.
Adjust the watering schedule or move the plant to a shadier location.
-
Brown leaf tips: This can be a sign of low humidity or over-fertilization.
Increase humidity levels by misting the leaves or placing a tray of water near the plant, and reduce the amount of fertilizer.
-
Pests: Anthuriums can attract pests such as spider mites, mealybugs, and scale. Use a gentle insecticidal soap or neem oil to treat infestations.
By following these aftercare tips and troubleshooting common issues, your Anthurium Andraeanum cuttings will thrive and grow into beautiful, flourishing plants.
Frequently Asked Questions

Can you grow Anthurium from a cutting?
Yes, Anthurium can be grown from cuttings. In fact, it is one of the most common methods of propagation.
The best time to take a cutting is during the growing season, which is usually in the spring or summer.
How do you propagate Anthurium leaves in water?
To propagate Anthurium leaves in water, simply cut a healthy leaf from the plant and place it in a container filled with water.
Change the water every few days to prevent it from becoming stagnant. After a few weeks, roots should begin to grow from the base of the leaf.
Once the roots are at least an inch long, the leaf can be planted in soil.
What is the best way to root an Anthurium stem cutting?
The best way to root an Anthurium stem cutting is to take a cutting that has at least two nodes and a few leaves.
Dip the cut end of the stem in rooting hormone and plant it in a well-draining potting mix. Keep the soil moist and in a warm, bright location.
Roots should begin to grow within a few weeks.
Can Anthurium be propagated from seeds, and if so, how?
Yes, Anthurium can be propagated from seeds. However, it can be a slow and difficult process.
The seeds need to be fresh and planted in a well-draining potting mix. Keep the soil moist and in a warm, bright location.
It can take several months for the seeds to germinate and even longer for the plants to mature.
What are the steps to propagate Anthurium crystallinum successfully?
To propagate Anthurium crystallinum successfully, take a stem cutting with at least two nodes and a few leaves.
Dip the cut end of the stem in rooting hormone and plant it in a well-draining potting mix. Keep the soil moist and in a warm, bright location.
Roots should begin to grow within a few weeks. Once the plant has established roots, it can be transplanted into a larger pot.
What techniques are used for commercial propagation of Anthurium plants?
Commercial growers often use tissue culture to propagate Anthurium plants.
This involves taking a small piece of tissue from the plant and growing it in a sterile environment.
The resulting plants are genetically identical to the parent plant and can be grown quickly and efficiently.
However, tissue culture requires specialized equipment and expertise, making it impractical for most home growers.