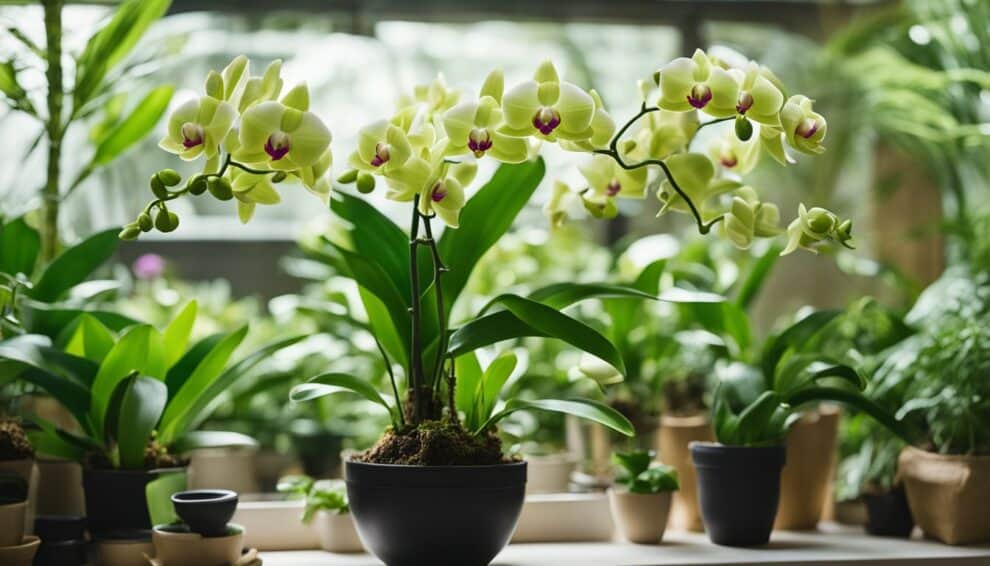
Dendrobiums are breathtaking orchids that are popular among gardeners and orchid enthusiasts alike.
They are known for their beautiful blooms and long-lasting flowers that come in various colors, shapes, and sizes.
One of the best ways to propagate dendrobiums is by dividing them, which allows you to create new plants from an existing one.
In this article, we’ll explore step-by-step propagation techniques for stunning dendrobiums.

Dividing dendrobiums is a simple process that requires a bit of patience and care.
It involves separating the plant into smaller sections, each with its own roots and stems.
By doing so, you can create new plants that are genetically identical to the original one, ensuring that they will produce the same beautiful blooms.
In addition, dividing dendrobiums can help rejuvenate an old or overgrown plant, promoting new growth and healthier roots.
Whether you’re a seasoned gardener or a beginner, this article will provide you with all the information you need to successfully divide your dendrobiums.
From choosing the right time to dividing the plant and caring for the new sections, we’ll cover everything you need to know to propagate your dendrobiums like a pro.
So, let’s get started and learn how to create stunning orchids through dividing dendrobiums!
Understanding Dendrobium Orchids
Dendrobium orchids are a diverse group of plants that are native to tropical and subtropical regions of Asia, Australia, and the Pacific islands.
They are known for their stunning blooms and are popular among orchid enthusiasts.
Species Varieties
There are over 1,500 species of dendrobium orchids, each with its unique characteristics. Some of the most common species include:
- Dendrobium nobile: Known for its fragrant, white or pink flowers and its ability to bloom in the winter.
- Dendrobium phalaenopsis: A hybrid species that produces large, showy flowers in a range of colors, including pink, purple, and white.
- Dendrobium kingianum: A hardy species that is easy to grow and produces clusters of small, fragrant flowers in shades of pink and purple.
Growth Requirements
Dendrobium orchids are epiphytes, meaning they grow on other plants, such as trees, in their native habitats.
As such, they require a well-draining potting mix that allows air to circulate around their roots.
They also require bright, indirect light and high humidity to thrive.
Here are some tips for growing dendrobium orchids:
- Water regularly but avoid overwatering, as this can lead to root rot.
- Fertilize regularly during the growing season with a balanced orchid fertilizer.
- Repot every 2-3 years to refresh the potting mix and prevent the plant from becoming root-bound.
By understanding the different species of dendrobium orchids and their growth requirements, you can successfully grow and propagate these stunning plants.
Preparation for Propagation

Tools and Materials
Before starting the process of dividing dendrobiums, it is necessary to gather all the required tools and materials. These include:
- Sharp and sterilized scissors or pruning shears
- A clean and sterilized knife
- A rooting hormone powder
- A clean and sterilized container filled with a suitable potting mix
- Labels to identify the new plants
It is important to sterilize the tools and materials to prevent the spread of any diseases or pests that may harm the plant.
Choosing the Right Time
The best time to divide dendrobiums is during the plant’s active growing season, which is usually in the spring or early summer.
It is important to choose a time when the plant is healthy and has not recently undergone any stress, such as repotting or pruning.
It is also important to choose a time when the weather is mild, as extreme temperatures can cause stress to the plant and affect its ability to recover from the division process.
By preparing the necessary tools and materials and choosing the right time, the process of dividing dendrobiums can be successful and lead to the propagation of stunning orchids.
Propagation Steps

Division Process
Dendrobium orchids can be propagated through division, which involves separating the plant into smaller sections.
This is typically done when the plant has outgrown its current pot or when the grower wants to create new plants.
Here are the steps to divide a Dendrobium orchid:
- Start by removing the plant from its pot and gently shaking off any excess soil.
- Carefully examine the plant’s roots and identify areas where the plant can be divided.
Look for sections that have at least two or three healthy pseudobulbs (thickened stems that store water and nutrients).
- Using a sharp, sterile knife or scissors, cut the plant into sections.
Make sure each section has at least two or three pseudobulbs and a healthy root system.
- Dust the cut sections with a fungicide to prevent infection.
- Allow the cut sections to dry for a few hours before potting.
Potting and Aftercare
After dividing a Dendrobium orchid, the next step is to pot the new sections and provide proper aftercare.
Here are the steps to pot and care for newly divided Dendrobium orchids:
- Choose a pot that is slightly larger than the section you are potting.
Make sure the pot has drainage holes and is filled with a well-draining orchid mix.
- Gently place the section into the pot and fill in around it with more orchid mix. Press down lightly to ensure the section is secure.
- Water the plant thoroughly and allow the excess water to drain out of the bottom of the pot.
- Place the newly potted orchid in a bright, indirect light. Avoid direct sunlight, which can burn the plant’s leaves.
- Water the plant when the top inch of soil feels dry to the touch.
Fertilize the plant every two weeks during the growing season with a balanced orchid fertilizer.
- Monitor the plant for signs of stress, such as yellowing leaves or wilting. Adjust watering and lighting as needed to ensure the plant stays healthy.
Frequently Asked Questions

What is the best time of year to divide Dendrobium orchids?
The best time to divide Dendrobium orchids is during the spring or early summer when the plant is actively growing.
This is when the plant is most likely to recover quickly from the stress of being divided and will have the best chance of producing new growth.
Can you explain the process of dividing Dendrobium orchids for propagation?
To divide a Dendrobium orchid, start by removing the plant from its pot and gently shaking off any loose soil.
Then, carefully separate the individual stems or pseudobulbs, making sure that each section has at least one healthy root.
Trim away any dead or damaged roots and pot each division into a new container filled with fresh orchid compost.
How do I care for Dendrobium cuttings during the propagation phase?
During the propagation phase, it is important to keep the Dendrobium cuttings in a warm and humid environment, away from direct sunlight.
Mist the cuttings regularly to keep them moist, and avoid overwatering as this can lead to root rot.
Once new growth appears, gradually increase the amount of light the plant receives.
Are there any special considerations when propagating bamboo orchids?
Bamboo orchids, also known as Arundina orchids, can be propagated using the same techniques as Dendrobiums.
However, it is important to note that bamboo orchids prefer a more acidic soil mix than other orchids.
Additionally, they may require more frequent watering and fertilization.
What are the signs that a Dendrobium keiki is ready to be separated and replanted?
A Dendrobium keiki, or baby plant, can be separated from the parent plant once it has developed its own set of roots and at least two healthy leaves.
The keiki can then be carefully removed from the parent plant and potted into its own container.
How should I prepare orchid compost for repotting newly divided Dendrobiums?
To prepare orchid compost for repotting newly divided Dendrobiums, mix together equal parts of bark chips, sphagnum moss, and perlite.
This will create a well-draining soil mix that will provide the plant with the necessary nutrients and support.


