
Elephant Ear Plant Propagation: A Simple Guide to Colocasia

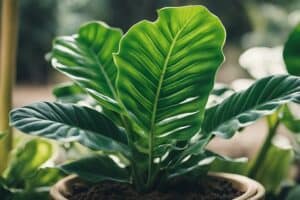
Colocasia, commonly known as elephant ear plant, is a tropical plant that belongs to the Araceae family.
It is renowned for its large, heart-shaped leaves that resemble elephant ears.
These plants are easy to grow and propagate, making them an excellent choice for both novice and experienced gardeners.
In this article, we will provide a simple guide to colocasia propagation.
Propagation is the process of creating new plants from existing ones.
Colocasia can be propagated through various methods, including division, cuttings, and seeds.
Division is the most common and straightforward method of propagation, where the plant is divided into smaller sections and replanted.
However, cuttings and seeds can also be used to propagate colocasia.
In this guide, we will cover all three methods of propagation in detail, so you can choose the one that works best for you.
Understanding Elephant Ear Plant Propagation
Elephant ear plants are a popular choice among gardeners due to their unique foliage and easy maintenance.
Propagating these plants can be a great way to expand your collection or share them with others.
In this section, we will explore the different types of elephant ear plants and the benefits of propagation.
Types of Elephant Ear Plants
There are several types of elephant ear plants, but the most common ones are Colocasia and Alocasia.
Colocasia is known for its large, heart-shaped leaves and is often referred to as the “elephant ear” plant.
Alocasia, on the other hand, has more arrow-shaped leaves and is commonly known as the “upright elephant ear” plant.
Both types of plants can be propagated through rhizomes, which are underground stems that produce roots and shoots.
Rhizomes can be divided into smaller sections, each with its own set of roots and shoots, to create new plants.
Benefits of Propagation
Propagating elephant ear plants has several benefits. First, it allows you to create new plants without having to purchase them.
This can save you money in the long run, especially if you are looking to expand your collection.
Propagation can also help you maintain the health of your plants. Over time, older plants may become overcrowded and start to decline in health.
By propagating them, you can create new, healthier plants that will thrive in your garden.
Finally, propagating elephant ear plants can be a fun and rewarding experience.
Watching new plants grow and thrive can be a satisfying experience for any gardener, whether you are a beginner or an experienced pro.
In conclusion, understanding elephant ear plant propagation can help you expand your collection and maintain the health of your plants.
By dividing rhizomes and creating new plants, you can save money, improve the health of your garden, and enjoy the rewards of gardening.
Preparation for Propagation

Choosing the Right Time
The best time to propagate Elephant Ear plants is in the spring or early summer, when the plant is actively growing and has enough energy to produce new growth.
It is important to avoid propagating during the winter months, as the plant may be dormant and not have the energy to produce new growth.
Additionally, avoid propagating during the hottest months of the year, as the heat can stress the plant and make it more difficult for new growth to take root.
Gathering Necessary Supplies
Before propagating an Elephant Ear plant, it is important to gather all necessary supplies.
This includes a sharp, clean pair of pruning shears, a clean container filled with potting soil, and a rooting hormone powder.
It is also important to have a clean, well-lit workspace to ensure that the plant is not exposed to any harmful bacteria or fungi during the propagation process.
Once all necessary supplies have been gathered, it is important to prepare the plant for propagation by removing any dead or damaged leaves and identifying the location of the plant’s rhizome.
The rhizome is the thick, horizontal stem that grows underground and produces new shoots.
By identifying the location of the rhizome, it is easier to determine where to make the cut for propagation.
Propagation Methods

There are several methods for propagating elephant ear plants, including division, cuttings, and seed propagation.
Each method has its own advantages and disadvantages, and the best method for you will depend on your specific needs and preferences.
Division
Division is perhaps the most common method of propagating elephant ear plants.
It involves dividing the plant into smaller sections, each with its own root system. This can be done in the spring or fall, when the plant is dormant.
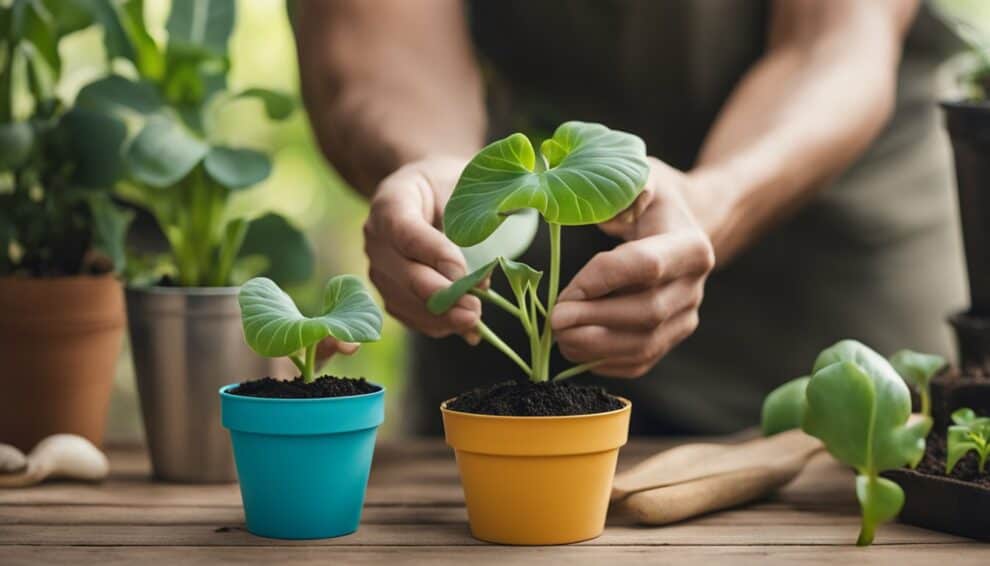
To divide an elephant ear plant, start by digging up the entire plant and removing any excess soil.
Then, use a sharp knife or garden shears to cut the plant into smaller sections, making sure that each section has at least one healthy leaf and a portion of the root system.
Once you have divided the plant, replant each section in a new container or in the ground, making sure to water it thoroughly.
With proper care, each section should grow into a healthy, mature plant.
Cuttings
Another method of propagating elephant ear plants is by taking cuttings.
This involves taking a small section of the plant and rooting it in water or soil.
To take a cutting, start by selecting a healthy leaf or stem from the plant.
Then, cut it off at a 45-degree angle, making sure to include a portion of the stem.
Dip the cut end in rooting hormone, and then place it in a container filled with water or moist soil.
Keep the cutting in a warm, humid location, and make sure to keep the soil or water moist at all times.
With proper care, the cutting should develop roots and grow into a healthy plant.
Seed Propagation
Finally, elephant ear plants can also be propagated from seed.
This method is less common than division or cuttings, but it can be a good option if you want to grow a large number of plants at once.
To propagate elephant ear plants from seed, start by collecting ripe seeds from a mature plant.
Then, plant the seeds in a container filled with moist soil, and cover them with a thin layer of soil.
Keep the container in a warm, humid location, and make sure to keep the soil moist at all times.
With proper care, the seeds should germinate within a few weeks, and the seedlings can be transplanted into individual containers or into the ground.
Aftercare for Propagated Plants

After successfully propagating your elephant ear plant, it is essential to provide proper aftercare to ensure its healthy growth.
The following subsections detail the initial plant care and long-term growth tips for your propagated colocasia.
Initial Plant Care
After planting your propagated colocasia, it is crucial to keep the soil moist and avoid overwatering.
Overwatering can lead to root rot, which can be fatal to the plant.
It is recommended to water the plant thoroughly once a week and ensure that the soil is well-draining.
Additionally, it is essential to provide the plant with adequate sunlight. Elephant ear plants thrive in partial shade to full sun, depending on the variety.
It is best to place the plant in a location that receives at least six hours of indirect sunlight per day.
Long-Term Growth Tips
To promote healthy growth, it is recommended to fertilize the plant every two to three weeks during the growing season.
Use a balanced fertilizer with equal parts nitrogen, phosphorus, and potassium.
Pruning is also an essential aspect of long-term growth. Remove any yellow or damaged leaves to prevent the spread of disease.
Additionally, cutting back the plant can promote bushier growth and prevent it from becoming too tall and top-heavy.
In colder climates, it is important to protect the plant during the winter months.
When the temperature drops below 50°F, move the plant indoors or cover it with a frost blanket.
By following these aftercare tips, your propagated elephant ear plant will thrive and add a tropical touch to your garden or indoor space.
Frequently Asked Questions

What is the best method to propagate Colocasia plants?
The best method to propagate Colocasia plants is by dividing the rhizomes.
This method is easy and reliable, and it ensures that the new plants will be genetically identical to the parent plant.
Can you grow elephant ear plants from cuttings, and if so, how?
Yes, you can grow elephant ear plants from cuttings. Take a cutting from the stem of the plant, making sure it has at least one leaf and one node.
Place the cutting in a pot with moist soil and keep it in a warm, bright location. In a few weeks, the cutting should start to grow roots and new leaves.
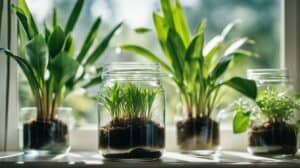
What are the steps to propagate an elephant ear plant in water?
To propagate an elephant ear plant in water, take a cutting from the stem of the plant, making sure it has at least one leaf and one node.
Place the cutting in a jar filled with water, making sure that the node is submerged. Change the water every few days to prevent bacteria from growing.
In a few weeks, the cutting should start to grow roots. Once the roots are a few inches long, you can transplant the cutting into soil.
When is the right time to divide and repot elephant ear bulbs?
The best time to divide and repot elephant ear bulbs is in the spring, just before new growth starts.
Gently dig up the bulbs and separate them into smaller sections, making sure that each section has at least one growing point.
Repot the sections in fresh soil and water them well.
How do you take a leaf cutting from an elephant ear plant for propagation?
To take a leaf cutting from an elephant ear plant, select a healthy leaf and cut it off at the base of the stem.
Make sure that the leaf has a long stem attached to it. Place the stem in a jar filled with water, making sure that the leaf is not submerged.
In a few weeks, the stem should start to grow roots. Once the roots are a few inches long, you can transplant the cutting into soil.
What should I look for when splitting an elephant ear plant?
When splitting an elephant ear plant, look for healthy rhizomes that have at least one growing point.
Make sure that each section has a good balance of roots and leaves.
Avoid splitting the plant into sections that are too small, as this can weaken the plant.