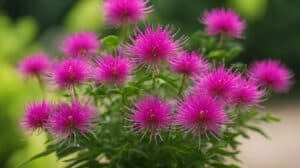

Chenille plants, also known as Acalypha hispida, are a popular choice for gardeners and indoor plant enthusiasts alike. With their soft and fluffy appearance, they add a touch of whimsy to any space. But did you know that you can easily propagate these plants to create even more of these fluffy wonders?

Propagating chenille plants can be a fun and rewarding experience for plant lovers. Not only does it allow you to expand your collection, but it also gives you the opportunity to share the joy of these unique plants with others. In this article, we will explore the different methods of propagating chenille plants, including stem cuttings and division, and provide you with step-by-step instructions to help you get started. So, whether you are a seasoned gardener or a beginner, read on to learn how to propagate your own fluffy wonders.
Understanding the Chenille Plant
Botanical Profile
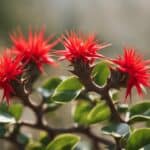
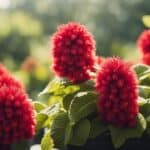
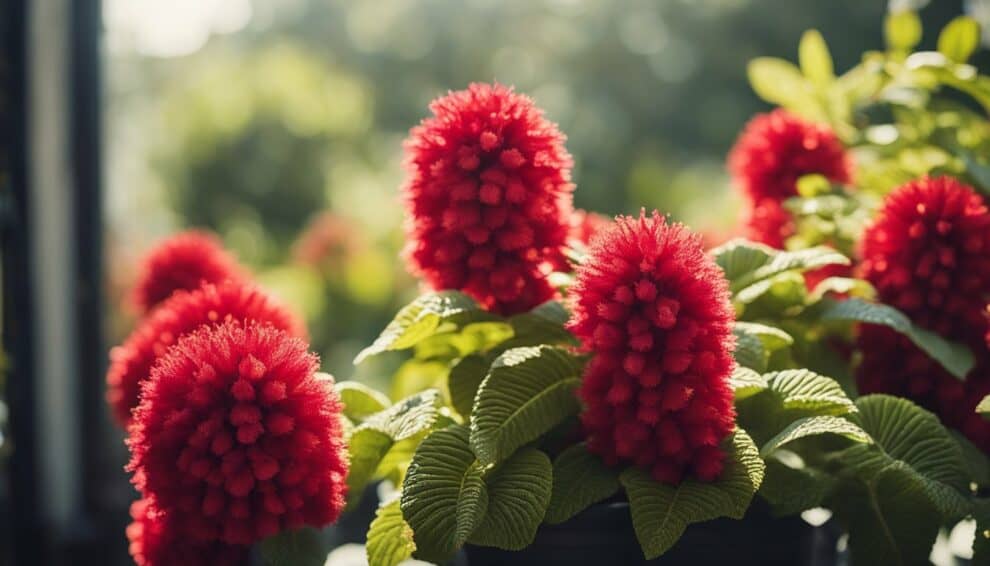
The Chenille Plant, also known as Acalypha hispida, is a tropical shrub that belongs to the Euphorbiaceae family. It is native to Indonesia, Malaysia, and the Philippines. The plant is characterized by its long, fuzzy, and bright red flowers that resemble caterpillars or fuzzy ropes.
The Chenille Plant can grow up to 6 feet in height and 4 feet in width. Its leaves are dark green, glossy, and oval-shaped. The plant produces flowers all year round in tropical climates, but in colder regions, it blooms during the summer and fall months.
Growth Habits
The Chenille Plant is a fast-growing shrub that thrives in warm and humid conditions. It prefers well-draining soil and partial shade. The plant can tolerate full sun, but it may cause the leaves to wilt and turn yellow.
To propagate the Chenille Plant, stem cuttings can be taken during the spring or summer months. The cuttings should be at least 6 inches long and should have at least 2-3 leaves. The cuttings should be dipped in rooting hormone and planted in a pot with well-draining soil. The pot should be covered with a plastic bag to create a humid environment, and the plant should be kept in a warm and bright location.
Overall, the Chenille Plant is a unique and beautiful addition to any tropical garden. With its bright red, fuzzy flowers and fast growth habits, it is sure to impress any plant enthusiast.
Propagation Basics

Propagation Methods
There are two common methods to propagate Chenille Plant: stem cuttings and air layering.
Stem Cuttings
Stem cuttings is the most common method to propagate Chenille Plant. It involves taking a 4-6 inch long stem cutting from a mature plant and planting it in a pot filled with well-draining soil. Before planting, remove the lower leaves from the cutting and dip the cut end into a rooting hormone powder. Water the soil and keep it moist, but not too wet. Place the pot in a bright, warm location and wait for roots to form. This process usually takes 3-4 weeks.
Air Layering
Air layering is a more advanced method of propagation that involves creating a small wound on a mature stem and wrapping it with moist sphagnum moss. Once roots have formed, the stem can be cut and planted in a pot. This method is best for larger plants that are difficult to propagate with stem cuttings.
Best Time to Propagate
The best time to propagate Chenille Plant is in the spring or summer when the plant is actively growing. Avoid propagating during the winter when the plant is dormant. It is also important to choose a healthy, disease-free plant to ensure successful propagation.
Step-by-Step Propagation

Cutting and Preparing
To propagate the Chenille plant, the first step is to take cuttings from the mother plant. Choose a healthy stem that is at least 6 inches long and has several leaves. Using a clean, sharp pair of scissors or pruning shears, cut the stem just below a node (the point where a leaf meets the stem). Remove the lower leaves from the stem, leaving only a few at the top.
Next, dip the cut end of the stem in rooting hormone powder to encourage root growth. This step is optional but can increase the chances of successful propagation.
Rooting Process
After preparing the cutting, it’s time to start the rooting process. Fill a small pot or container with a well-draining soil mix, such as a 50/50 blend of perlite and peat moss. Make a small hole in the soil and insert the cutting, gently pressing the soil around it. Water the soil thoroughly and cover the pot with a plastic bag to create a humid environment.
Place the pot in a bright, indirect light location, such as near a window. Keep the soil moist but not waterlogged and remove any leaves that start to yellow or wilt. In about 2-3 weeks, the cutting should start to develop roots. You can check by gently tugging on the stem. If you feel resistance, the roots have started to grow.
Transplanting
Once the cutting has developed roots, it’s time to transplant it into a larger container or into the garden. Choose a location with well-draining soil and partial to full sun exposure. Dig a hole and gently remove the cutting from its pot, being careful not to damage the roots. Place the plant in the hole and backfill with soil, pressing down gently to remove any air pockets. Water the plant thoroughly and continue to keep the soil moist until it becomes established.
By following these simple steps, anyone can propagate the beautiful Chenille plant and enjoy its fluffy wonders in their own garden or home.
Aftercare for Propagated Plants

Watering and Feeding
Proper watering and feeding are crucial for the growth and health of propagated chenille plants. It is important to keep the soil consistently moist, but not waterlogged, as this can lead to root rot. Watering once or twice a week is usually sufficient, but this may vary depending on the climate and humidity levels.
In terms of feeding, it is recommended to fertilize the plants every two to three weeks with a balanced fertilizer. This will provide the necessary nutrients for healthy growth and vibrant foliage. Be sure to follow the instructions on the fertilizer package and avoid over-fertilizing, as this can damage the plants.
Pruning and Maintenance
Regular pruning is essential for maintaining the shape and size of chenille plants. It is best to prune in the spring or summer, as this is when the plant is actively growing. Use sharp, clean scissors or pruning shears to remove any dead or damaged leaves and branches.
In addition to pruning, it is important to keep an eye out for pests and diseases. Common pests that can affect chenille plants include spider mites and whiteflies. If you notice any signs of infestation, such as yellowing leaves or webbing, treat the plants with an insecticidal soap or neem oil.
Overall, with proper care and maintenance, propagated chenille plants can thrive and bring joy to any indoor or outdoor space.
Frequently Asked Questions

What are the steps to propagate a Chenille Plant from cuttings?
To propagate a Chenille Plant from cuttings, you will need to follow these simple steps:
- Cut a stem from the parent plant that is approximately 6 inches long.
- Remove the leaves from the bottom 2 inches of the stem.
- Dip the cut end of the stem in rooting hormone powder.
- Plant the stem in a pot filled with a well-draining potting mix.
- Water the soil and cover the pot with a plastic bag to create a humid environment.
- Place the pot in a bright, indirect light and wait for the roots to develop.
Can you grow a Chenille Plant from seeds, and if so, how?
Yes, you can grow a Chenille Plant from seeds. Here are the steps:
- Collect the seeds from the parent plant.
- Sow the seeds in a pot filled with a well-draining potting mix.
- Cover the seeds with a thin layer of soil.
- Water the soil and place the pot in a bright, indirect light.
- Keep the soil moist and wait for the seeds to germinate.
How can you differentiate between male and female Chenille Plants?
Male and female Chenille Plants can be differentiated by their flowers. Male flowers are longer and more cylindrical, while female flowers are shorter and rounder.
What is the ideal environment for growing an Acalypha Hispida indoors?
An Acalypha Hispida plant thrives in a warm and humid environment. It needs bright, indirect light and well-draining soil. Keep the soil moist but not waterlogged, and mist the leaves regularly to increase humidity.
Are there any special care instructions for Chenille Plants during propagation?
During propagation, it is important to keep the soil moist and the plant in a humid environment. Avoid direct sunlight and extreme temperatures, as this can stress the plant and hinder root development.
Is the Chenille Plant toxic to pets or humans, and what precautions should be taken?
The Chenille Plant is toxic to pets and humans if ingested. It contains a substance called hydrocyanic acid, which can cause nausea, vomiting, and other symptoms. Keep the plant out of reach of children and pets, and wash your hands thoroughly after handling it.