


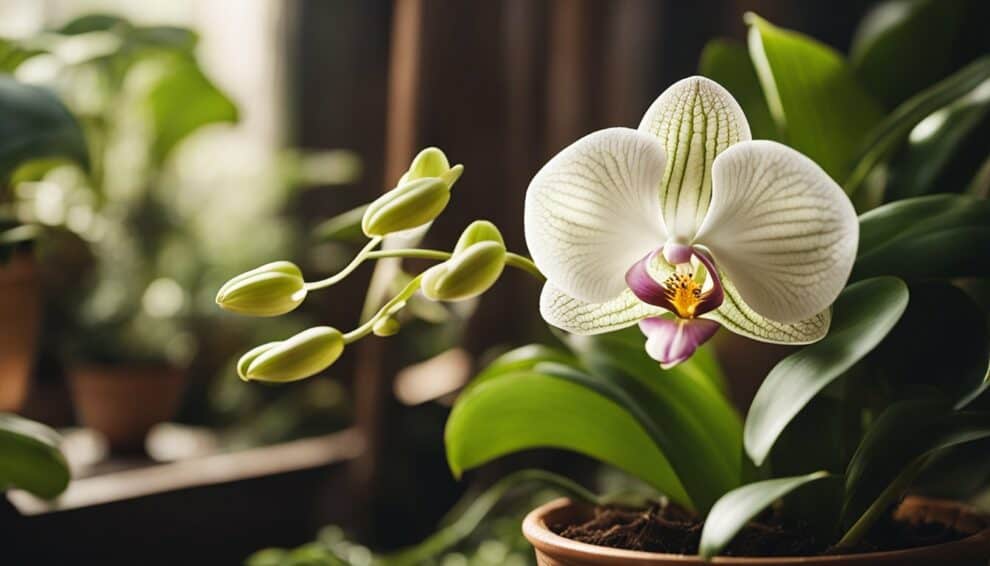
Moth orchids, also known as Phalaenopsis spp., are one of the most popular orchids among plant enthusiasts. They are easy to care for and produce beautiful flowers that can bloom for months. However, propagating moth orchids can be a bit tricky for beginners. In this article, we will provide a beginner’s guide to moth orchid propagation, including tips and tricks to help you successfully propagate your orchids.

Propagation is the process of creating new plants from existing ones. With moth orchids, propagation can be done through stem or leaf cuttings, keiki (baby plant) production, or seed germination. Each method has its own advantages and disadvantages, and it’s important to choose the right method for your specific situation. This article will cover the basics of each propagation method, as well as the tools and materials needed to get started. Whether you’re a seasoned orchid grower or a beginner, this guide will help you propagate your moth orchids successfully.
Understanding the Moth Orchid
Species Overview
Moth Orchids, also known as Phalaenopsis spp., are a popular genus of orchids that are native to Southeast Asia, Australia, and the Pacific Islands. They are known for their large, showy flowers that come in a variety of colors, including white, pink, yellow, and purple. Moth Orchids are epiphytic, meaning they grow on other plants, and are often found growing on trees in their natural habitat.
Habitat and Natural Conditions
Moth Orchids are native to tropical and subtropical regions, where they grow in warm, humid environments. In the wild, they can be found growing in the understory of forests, where they receive filtered sunlight and are protected from direct sunlight. They prefer temperatures between 60 and 85 degrees Fahrenheit and require high humidity levels to thrive.
Moth Orchids are adapted to growing in nutrient-poor environments, which is why they are epiphytic. They have evolved to absorb nutrients and moisture from the air and rainwater that collects on their leaves and roots. In cultivation, Moth Orchids are typically grown in a well-draining, bark-based potting mix and require frequent watering to maintain high humidity levels.
Overall, Moth Orchids are a beautiful and fascinating species of orchid that can be easily grown and propagated with the right care and attention.
Propagation Basics

Moth orchids (Phalaenopsis spp.) are one of the most popular orchids among gardeners due to their ease of care and beautiful blooms. Propagation is an excellent way to increase the number of plants in your collection or share them with friends and family. Here are some basics of propagating moth orchids.
Tools and Materials
To propagate moth orchids, you will need the following tools and materials:
- Sharp, clean scissors or pruning shears
- Clean, clear plastic containers with lids
- Sterilized potting mix
- Rooting hormone (optional)
- Labels
Sterilization Techniques
Sterilization is essential to prevent the spread of diseases and pests in your orchids. Here are some sterilization techniques to follow:
- Sterilize your tools by wiping them down with rubbing alcohol or dipping them in a solution of one part bleach to nine parts water.
- Use clean, clear plastic containers with lids to create a mini greenhouse for your orchids. Clean the containers with soap and water and rinse them thoroughly before use.
- Sterilize your potting mix by baking it in the oven at 180°F for 30 minutes or microwaving it for 2-3 minutes.
- Use labels to keep track of the parent plant, date of propagation, and any notes about the process.
By following these simple propagation basics, you can successfully propagate your moth orchids and enjoy more of these beautiful plants.
Propagation Methods

Moth orchids (Phalaenopsis spp.) are popular houseplants due to their long-lasting blooms, ease of care, and ability to adapt to a variety of growing conditions. Propagating moth orchids is a great way to expand your collection or share your love of these beautiful plants with others. Here are three common methods of propagating moth orchids:
Division
Division is the most common method of propagating moth orchids. It involves separating the plant into two or more smaller plants, each with its own root system. To divide a moth orchid, follow these steps:
- Remove the plant from its pot and gently separate the roots.
- Identify any natural divisions in the plant, such as clumps of leaves or multiple stems.
- Use a clean, sharp knife or scissors to cut the plant into smaller sections, making sure each section has at least one healthy stem and a few roots.
- Dust the cut ends with cinnamon or sulfur powder to prevent infection.
- Plant each section in a new pot with fresh potting mix and water thoroughly.
Keiki Paste Application
Keiki paste is a hormone-based paste that can be used to stimulate the growth of new plants from the nodes of moth orchid stems. To propagate a moth orchid using keiki paste, follow these steps:
- Identify a healthy stem with a node that is at least 3 inches (8 cm) from the base of the plant.
- Apply a small amount of keiki paste to the node using a toothpick or cotton swab.
- Cover the node with a piece of damp sphagnum moss and wrap it in plastic wrap.
- Place the stem in a warm, humid location with bright, indirect light.
- Check the moss regularly and mist it with water if it starts to dry out.
- After a few weeks, new roots and leaves should start to grow from the node. Once the new plant has several leaves and roots, it can be removed from the stem and potted in fresh potting mix.
Seed Cultivation
Seed cultivation is the least common method of propagating moth orchids, as it requires specialized equipment and can be time-consuming. However, it can be a rewarding way to create new and unique varieties of moth orchids. To propagate a moth orchid from seed, follow these steps:
- Collect the seed pods from a mature moth orchid plant.
- Sterilize the seeds by soaking them in a 10% bleach solution for 10 minutes.
- Sow the seeds in a sterile growing medium, such as agar or sphagnum moss.
- Place the seeds in a warm, humid location with bright, indirect light.
- Keep the growing medium moist and mist the seeds regularly.
- After several weeks, the seeds should germinate and start to grow into small plants.
- Once the plants are large enough, they can be transplanted into individual pots with fresh potting mix.
Aftercare and Troubleshooting

Post-Propagation Care
Once the new plantlets have developed roots and leaves, it’s time to remove them from the parent plant and pot them individually. Use a clean, sharp knife or scissors to cut the baby plant from the parent stem. Make sure to sterilize the cutting tool to avoid introducing any disease or infection to the new plant.
Prepare a small pot with fresh potting mix and plant the new orchid, making sure to keep the roots covered with soil. Water the plant thoroughly and place it in a warm, bright location, but away from direct sunlight. Keep the soil moist but not waterlogged, and avoid fertilizing the plant for several weeks to allow it to adjust to its new environment.
Common Issues and Solutions
Moth orchids are generally easy to care for, but there are a few common issues that can arise:
-
Yellowing leaves: If the leaves of your orchid are turning yellow, it may be a sign of overwatering or underwatering. Check the soil moisture level and adjust your watering schedule accordingly. If the roots are mushy or brown, they may be rotting due to overwatering. In this case, repot the orchid in fresh, well-draining soil.
-
Bud drop: If the buds of your orchid are falling off before they have a chance to bloom, it may be due to a lack of humidity or too much direct sunlight. Try placing a humidifier near the plant or misting it regularly to increase the humidity. Move the plant to a location with indirect sunlight.
-
Root rot: If the roots of your orchid are brown and mushy, they may be rotting due to overwatering or poor drainage. Repot the orchid in fresh, well-draining soil and adjust your watering schedule to prevent overwatering.
By following these simple aftercare tips and troubleshooting solutions, even beginner gardeners can successfully propagate and care for moth orchids.
Frequently Asked Questions

What are the steps to propagate Phalaenopsis orchids from cuttings?
To propagate Phalaenopsis orchids from cuttings, first, you need to select a healthy and matured stem. Then, cut the stem just below a node or aerial root. Apply rooting hormone to the cut end and plant it in a well-draining potting mix. Keep the pot in a warm and humid place and water it regularly. After a few weeks, you should see new growth emerging from the cutting.
Can I grow a new orchid from a stem cutting, and if so, how?
Yes, you can grow a new orchid plant from a stem cutting. Follow the same steps as mentioned above for propagating Phalaenopsis orchids from cuttings. However, keep in mind that not all orchid species can be propagated from stem cuttings.
What’s the best way to start propagating orchids in water?
While it is possible to propagate some orchids in water, it is not recommended as it can lead to root rot and other issues. Instead, it is better to propagate orchids in a well-draining potting mix.
How do you care for Phalaenopsis orchids as a beginner?
Phalaenopsis orchids are relatively easy to care for as a beginner. They require bright, indirect light, moderate watering, and a well-draining potting mix. Keep the plant in a warm and humid environment and fertilize it regularly during the growing season.
Is it possible to propagate an orchid from its leaves?
While it is possible to propagate some orchids from their leaves, it is not recommended as it can be challenging and may not always be successful. It is better to propagate orchids from stem cuttings or division.
How can you successfully grow Phalaenopsis orchids indoors?
To successfully grow Phalaenopsis orchids indoors, provide them with bright, indirect light, moderate watering, and a warm and humid environment. Use a well-draining potting mix and fertilize the plant regularly during the growing season. Avoid exposing the plant to direct sunlight or cold drafts.