Orchids are one of the most popular flowering plants that are widely cultivated for their beauty, elegance, and fragrance.
Among the various types of orchids, the Phalaenopsis or Moth orchid is a favorite among beginners and experienced growers alike.
While these orchids are relatively easy to care for, propagating them can be a challenge for many.
This is where a beginner’s guide to multiplying Phalaenopsis comes in handy.

Propagation is the process of creating new plants from existing ones.
Orchid propagation involves creating new plants from various parts of the parent plant, such as the stem, leaves, or roots.
While it may seem daunting at first, propagating orchids can be a rewarding experience, especially when done correctly.
This article aims to provide a beginner’s guide to multiplying Phalaenopsis, focusing on the most common and easiest propagation methods.
With this guide, even novice orchid enthusiasts can successfully propagate their Phalaenopsis and enjoy the beauty of these stunning flowers in their home or garden.
Understanding Orchids
Orchid Biology
Orchids are a diverse family of flowering plants that belong to the Orchidaceae family, which is one of the largest plant families in the world.
Orchids are known for their beautiful and intricate flowers, which come in a wide variety of shapes, sizes, and colors.
They are also known for their unique reproductive strategies, which involve a symbiotic relationship with fungi and specialized pollinators.
Orchids can be found all over the world, from the tropics to the Arctic Circle.
They grow in a wide variety of habitats, including rainforests, deserts, and even on rocks and trees.
Orchids are epiphytes, which means they grow on other plants without harming them.
They obtain their nutrients and water from the air and rain.
Popular Phalaenopsis Varieties
Phalaenopsis, also known as moth orchids, are one of the most popular orchid varieties for beginners.
They are easy to care for and come in a wide variety of colors and patterns. Some of the most popular Phalaenopsis varieties include:
- Phalaenopsis amabilis
- Phalaenopsis bellina
- Phalaenopsis lueddemanniana
- Phalaenopsis schilleriana
Phalaenopsis orchids are known for their long-lasting flowers, which can bloom for several months at a time.
They prefer bright, indirect light and should be watered once a week. It is important to avoid overwatering, as this can lead to root rot.
With proper care, Phalaenopsis orchids can live for several years and produce multiple blooms.
Propagation Basics

Propagating orchids might seem daunting to beginners, but it’s actually a simple and rewarding process.
In this section, we will cover the basics of orchid propagation, including the methods and tools necessary to multiply Phalaenopsis orchids.
Propagation Methods
There are two primary methods of orchid propagation: division and stem cutting.
Division: This method involves separating the orchid plant into two or more sections, each with its own roots and leaves.
To divide an orchid, carefully remove it from its pot and gently separate the roots into sections, making sure each section has at least one healthy stem and a few leaves.
Then, repot each section in a new pot with fresh orchid mix.
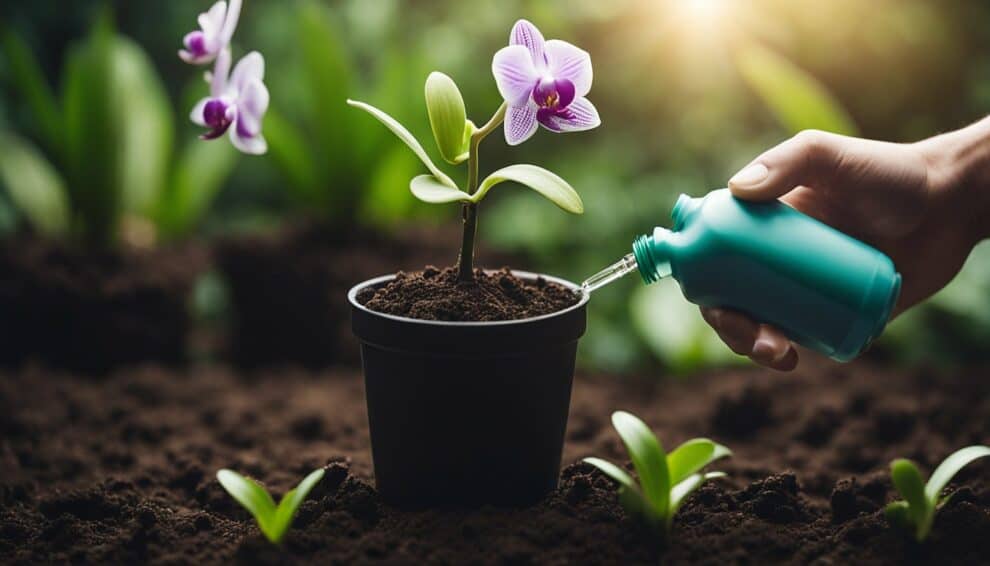
Stem Cutting: This method involves cutting a healthy stem from the orchid plant and rooting it in a new pot.
To do this, select a stem with at least two healthy nodes and cut it just below the second node.
Dip the cut end in rooting hormone, then plant it in a pot with fresh orchid mix.
Keep the soil moist and warm until the stem begins to grow new leaves and roots.
Tools and Materials
To propagate orchids, you will need a few basic tools and materials:
- Sharp, clean scissors or pruning shears
- Rooting hormone
- Fresh orchid mix
- New pots
- Labels to identify each new plant
Make sure to use sterile tools and fresh materials to prevent the spread of disease and ensure the health of your new orchids.
With these basic methods and tools, anyone can successfully propagate Phalaenopsis orchids. Happy growing!
Step-by-Step Propagation

Sterilizing Equipment
Before starting the propagation process, it is essential to sterilize all the equipment to prevent any bacterial or fungal infections.
The equipment required for propagation includes a sharp pair of scissors, a clean razor blade, a rooting hormone, and a potting mix.
To sterilize the equipment, dip the scissors and razor blade in a solution of 70% isopropyl alcohol for at least 5 minutes.
After that, rinse them with clean water and dry them with a clean cloth.
Cutting and Separating
The first step in propagation is to identify a healthy Phalaenopsis plant with at least two healthy leaves and aerial roots.
Once identified, cut the stem above the node using a sharp pair of scissors.
Then, cut the stem into sections of 3 to 4 inches long, with each section having at least one node.
After cutting the stem, apply rooting hormone to the cut end of each section.
Then, plant each section in a potting mix, making sure that the node is above the soil surface.
Water the plant thoroughly and place it in a warm, humid place with indirect sunlight.
Potting and Aftercare
After planting the sections, it is crucial to take care of the plant to ensure successful propagation.
Keep the soil moist but not waterlogged, and avoid direct sunlight or extreme temperatures.
Within a few weeks, the plant will start to grow new roots and leaves.
Once the plant has established itself, it can be transplanted into a larger pot with a suitable potting mix.
By following these simple steps, anyone can propagate Phalaenopsis orchids successfully.
With a little patience and care, you can multiply your orchid collection and enjoy their beautiful blooms for years to come.
Troubleshooting Common Issues

Pests and Diseases
Phalaenopsis orchids are susceptible to various pests and diseases that can harm or even kill the plant.
Here are some common issues and how to address them:
- Spider mites: These tiny pests can cause yellowing and browning of leaves, as well as webbing on the plant.
To treat spider mites, spray the plant with a mixture of water and dish soap or use an insecticide specifically designed for spider mites.
- Scale insects: These small, oval-shaped pests can appear as brown or white bumps on the plant.
They can cause yellowing and wilting of leaves, as well as sticky honeydew on the plant.
To treat scale insects, scrape them off the plant with a toothbrush or cotton swab dipped in rubbing alcohol.
- Root rot: This fungal disease can occur when the plant is overwatered or the soil is too moist.
Symptoms include yellowing and wilting of leaves, as well as mushy and brown roots.
To treat root rot, remove the affected roots and repot the plant in fresh, well-draining soil.
Environmental Stressors
Phalaenopsis orchids can also be affected by environmental stressors, such as changes in temperature, humidity, and light.
Here are some common issues and how to address them:
- Sunburn: This can occur when the plant is exposed to too much direct sunlight, causing brown or black spots on the leaves.
To prevent sunburn, move the plant to a shadier location or use a sheer curtain to filter the sunlight.
- Cold damage: This can occur when the plant is exposed to temperatures below 60°F (15°C), causing yellowing and wilting of leaves.
To prevent cold damage, keep the plant in a warm location away from drafts or cold windows.
- Low humidity: This can cause the leaves to become dry and brittle, as well as inhibit flower production.
To increase humidity, place a tray of water near the plant or use a humidifier.
By being aware of these common issues and taking the necessary steps to address them, you can ensure that your Phalaenopsis orchids thrive and multiply with ease.
Frequently Asked Questions

What are the steps to propagate Phalaenopsis orchids from cuttings?
Propagating Phalaenopsis orchids from cuttings is a simple process. First, locate a healthy stem that has at least two nodes.
Cut the stem just below the second node from the top. Then, remove the lower leaves from the cutting, leaving only one or two at the top.
Finally, plant the cutting in a pot filled with a well-draining medium and keep it in a warm, humid environment until new growth appears.
Can you grow new orchids from aerial roots, and if so, how?
Yes, you can grow new orchids from aerial roots.
Simply cut the aerial root that has at least one node and plant it in a pot filled with a well-draining medium.
Keep the plant in a warm, humid environment until new growth appears.
Is it possible to propagate orchids in water, and what is the process?
Yes, it is possible to propagate orchids in water. First, locate a healthy stem and cut it just below the second node from the top.
Remove the lower leaves from the cutting, leaving only one or two at the top.
Then, place the cutting in a jar filled with water, making sure the bottom of the stem is submerged.
Keep the jar in a warm, bright location and change the water every few days.
Once new roots appear, transfer the cutting to a pot filled with a well-draining medium.
How can you divide a Phalaenopsis orchid to create new plants?
Dividing a Phalaenopsis orchid is a great way to create new plants. First, remove the plant from its pot and gently separate the roots.
Look for areas where the roots have formed clumps and gently pull them apart. Make sure each new clump has at least three healthy leaves and a good root system.
Then, plant each new clump in a pot filled with a well-draining medium.
Can a new orchid plant be grown from a leaf, and what method should be used?
Yes, a new orchid plant can be grown from a leaf. First, locate a healthy leaf and cut it at the base.
Then, make several small cuts along the length of the leaf and place it in a pot filled with a well-draining medium.
Keep the pot in a warm, humid environment and wait for new growth to appear.
Where is the best place to cut an orchid stem for successful regrowth?
The best place to cut an orchid stem for successful regrowth is just below the second node from the top.
This will leave enough stem for new growth to appear, while also allowing the plant to focus its energy on new shoots.


