
The Sago Palm (Cycas revoluta) is a prehistoric plant that has been around for millions of years. It is a popular ornamental plant that is native to Japan and is commonly found in gardens and landscapes around the world. The Sago Palm is not a true palm, but rather a cycad, which is a type of plant that has been around since the time of the dinosaurs.

Propagation of the Sago Palm can be done in a number of ways, including by seed, division, and offsets. However, propagating the Sago Palm from seed can be a slow and difficult process, as the seeds can take up to a year to germinate. Division and offsets, on the other hand, are much quicker and easier methods of propagation that can be done in just a few simple steps. In this article, we will explore the different methods of propagating the Sago Palm and provide tips for successful propagation.
Understanding Sago Palms
Taxonomy and History
Sago palms (Cycas revoluta) are a type of gymnosperm plant that belongs to the Cycadaceae family. They are native to Japan, but are now cultivated in many parts of the world. The plant’s scientific name, Cycas revoluta, comes from the Greek words “kykas” meaning “palm,” and “revoluta” meaning “curled back,” which refers to the plant’s leaf shape.
Sago palms have a long history of use in Japan and other parts of Asia. They have been cultivated for their starchy stems, which are used to make sago flour, a staple food in many parts of the world. The plant is also used for ornamental purposes due to its unique appearance and long lifespan.
Physical Characteristics
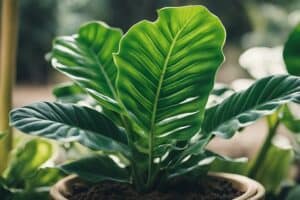
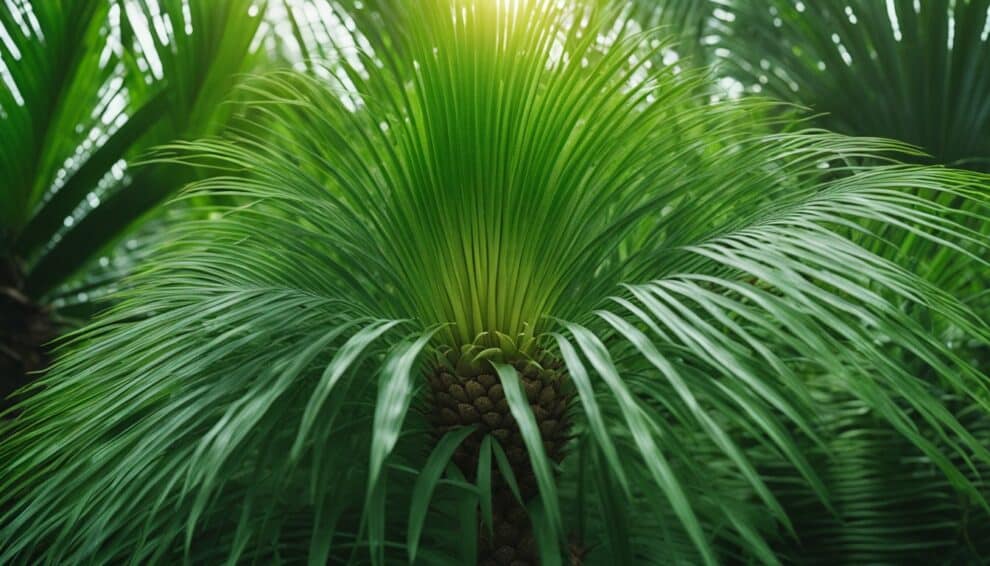
Sago palms are slow-growing plants that can reach up to 10 feet in height. They have a thick trunk with a crown of dark green, glossy leaves that grow in a rosette pattern. The leaves are pinnate, meaning they are divided into many small leaflets. The plant is dioecious, meaning it has separate male and female plants.
Sago palms are also known for their reproductive structures, which are cone-like structures that grow at the center of the plant. The male cones are smaller and produce pollen, while the female cones are larger and produce seeds. It can take several years for the plant to produce cones, and they only reproduce once every few years.
Overall, sago palms are fascinating plants that have a rich history and unique physical characteristics. Understanding these aspects of the plant is essential for successful propagation and cultivation.
Propagation Basics

Propagation Methods
Sago palm can be propagated through seeds, division of offsets, or removal of suckers. Seeds are the most common method of propagation, but they can take several years to mature into a plant. Division of offsets involves separating the small plants that grow at the base of the parent plant. This method is faster than seeds and ensures that the new plant will be identical to the parent plant. Removal of suckers involves cutting off the small plants that grow from the base of the parent plant. This method is the quickest, but it may not produce a plant that is identical to the parent plant.
Growth Requirements
Sago palm requires well-drained soil that is rich in organic matter. It prefers a slightly acidic soil with a pH between 5.5 and 6.5. The plant also needs to be grown in a location that receives full sun to partial shade. Sago palm is a slow-growing plant and does not require frequent watering. Overwatering can cause the roots to rot, so it is important to allow the soil to dry out between waterings. Fertilizer should be applied sparingly, as sago palm is sensitive to high levels of nutrients.
Practical Tips for Propagation

Seed Collection and Preparation
When collecting sago palm seeds, it is important to choose mature cones that have turned brown and are beginning to split open. The seeds should be removed from the cones and washed thoroughly to remove any remaining pulp. It is recommended to soak the seeds in water for 24-48 hours to help soften the outer layer of the seed and increase the chances of germination.
Planting and Aftercare
Sago palm seeds can be planted in a well-draining potting mix, with the pointed end of the seed facing upwards and just below the surface of the soil. Keep the soil moist but not waterlogged, and place the pot in a warm, bright location. Germination can take several months, so be patient.
Once the seedlings have emerged, they can be transplanted into individual pots with a well-draining soil mix. Sago palms prefer bright, indirect light and should be kept away from direct sunlight. They also prefer to be slightly root-bound, so avoid repotting too frequently.
Regular fertilization can help promote healthy growth, but be careful not to over-fertilize as this can lead to burnt leaves. Sago palms are also susceptible to scale insects, so keep an eye out for any signs of infestation and treat accordingly.
By following these practical tips, anyone can successfully propagate sago palms and enjoy these prehistoric greens in their own home or garden.
Frequently Asked Questions

How can you propagate a Sago Palm from its pups?
Sago Palm pups can be propagated by carefully removing them from the mother plant using a sharp, sterile knife. It is important to ensure that each pup has its own set of roots before removing it. Once removed, the pup can be planted in a well-draining soil mix and kept in a warm and humid environment until it establishes roots.
What is the best method to transplant Sago Palm pups?
The best method to transplant Sago Palm pups is to wait until they have established their own set of roots and have grown to a size that is at least one-third the size of the mother plant. Carefully dig around the pup and its roots, and then transplant it into a well-draining soil mix. Water the pup thoroughly and keep it in a warm and humid environment until it establishes roots in its new location.
What are the steps to propagate Sago Palm from seed?
To propagate Sago Palm from seed, start by soaking the seeds in water for 24 hours to soften the outer coating. Plant the seeds in a well-draining soil mix, and keep them in a warm and humid environment until they germinate. Once the seeds have germinated, transplant them into individual containers and continue to care for them until they are ready to be transplanted into their permanent location.
How do you know when Sago Palm pups are ready to be removed?
Sago Palm pups are ready to be removed when they have established their own set of roots and have grown to a size that is at least one-third the size of the mother plant. It is important not to remove the pups too early, as they may not have enough energy reserves to establish themselves in their new location.
What conditions are necessary for rooting Sago Palm pups in water?
To root Sago Palm pups in water, it is important to use a clean and sterile container filled with distilled or filtered water. The container should be placed in a warm and humid environment, with bright but indirect light. It is important to change the water every few days to prevent the growth of bacteria and algae.
How deep should you plant Sago Palm pups?
Sago Palm pups should be planted at a depth that is equal to their height. It is important to ensure that the soil is well-draining and that the pup is planted in a location that receives bright but indirect light. Water the pup thoroughly after planting, and continue to water it regularly until it establishes roots in its new location.